
Integration Steps
StringPay SDK Integration for Unity
Implementation of String Unity starts with integrating our StringPay SDK into your Unity project. Follow the steps below to begin.
Integrate Payment WebView
You will need the Card Info Prefab somewhere in your scene. This Prefab from the String SDK is used to tokenize the players card payment info in a PCI compliant manner.
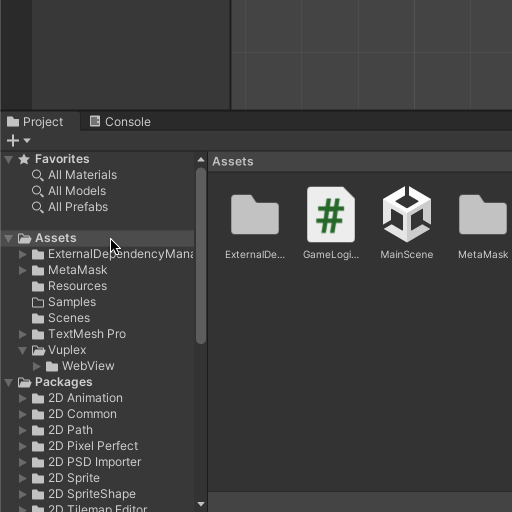
Go to Packages > String SDK > Runtime > Prefabs and drag the StringWebViewPrefab into the scene on top of your UI. It has a transparent background and can be resized and styled with custom CSS. More information about this prefab can be found in the Appendices section of this documentation.
Initialize the String SDK
In a method which runs on initialization in your code, initialize the String SDK ApiKey with your ApiKey. By default, the String SDK Environment is set to Sandbox. Once you are ready to change it to Production, you can include the line in the example below:
void Start()
{
    // Initialize the String SDK with our API key
    StringXYZ.ApiKey = "[your_api_key_here]";
    StringXYZ.Env = ENV_PROD; // Optional
}
Log the Player into String SDK
You may wish to start this step by creating a function to execute the Logic for logging the player in:
public async void LoginPlayerToString()
{
    // ...
}
Request Login Payload
Request the login payload:
var payloadToSign = await StringXYZ.RequestLogin(walletAddr);
You will need to get the players Wallet Address from whichever wallet service you are integrating with. There are dedicated sections in this documentation which describe integration with a few wallet services.
Decode Base64 Payload Nonce
Decode the Base64 login payload nonce to a human-readable form:
var base64decode = Encoding.UTF8.GetString(Convert.FromBase64String(payloadToSign.nonce));
Sign Login Payload
Sign the login payload using the players wallet:
var parameters = new string[] { walletAddr, base64decode };

var request = new MetaMaskEthereumRequest
{
	Method = "personal_sign",
	Parameters = parameters
};
var res = await metaMaskWallet.Request(request);
var sig = res.GetString();
Please refer to the Examples section of this documentation for examples of other wallet services.
Send Signed Login Payload
Send the signed login payload back to String:
LoginRequest login = new LoginRequest(
    nonce: payloadToSign.nonce,
    signature: sig
);

var response = await StringXYZ.Login(login);
Store Auth Token from Response (CHANGING SOON)
Store the authentication token and user data from the response:
StringXYZ.Authorization = response.authToken.token;
stringPlayerID = response.user.id;
Get status of the user
Once the user is logged in, you can check their status by examining the response.user.status value from the login response:
if (response.user.status == "unverified")
{
    await VerifyUser();
    return;
}
If the user is new
If the user is new, String will need the user's name and to validate the user's email prior to processing any transactions. Your game can send the user's name and email with SetUserName() and RequestEmailAuth().
var usernameRequest = new UserNameRequest(inputFirstName.text, inputMiddleName.text, inputLastName.text);
StringXYZ.SetUserName(usernameRequest, stringPlayerID);


StringXYZ.RequestEmailAuth(inputEmail.text, stringPlayerID);
Pre-Validating Email (optional)
The RequestEmailAuth() sends a validation email to the user. If the user's email has already been validated through a similar process by your game, and additional email validation can feel repetitive to the user. In order to provide a more streamlined user experience, we have the ability for you to provide String with a pre-validated user email. In this circumstance, the your game is attesting to having already confirmed that the user has control over the email address they've provided, and forwarding this email to String. To do so, use the Pre-Validate Email endpoint with the user's String ID and your organization's secret key. This action must be made using a secure API-to-API call, using a Secret API Key.
Request a Quote from the String SDK
We are ready to dive into the core functionality of the String SDK! To request a quote, you can call the Quote() method using the QuoteRequest object:
public async void GetQuoteFromString()
{
	// Get the players wallet address from wherever it is stored
    walletAddr = metaMaskWallet.SelectedAddress;

  // Populate the QuoteRequest
  QuoteRequest quoteRequest = new QuoteRequest(
    userAddress: walletAddr,
    chainId: 43113,
    contractAddress: "0xeA1fFe2cF6630a20E1BA397e95358DAF362c8781",
    contractFunction: "mintTo(address)",
    contractReturn: "uint256",
    contractParameters: new string[] { walletAddr },
    txValue: "0.08 eth",
    gasLimit: "800000");
  var quoteResponse = await StringXYZ.Quote(quoteRequest);
  lastQuote = quoteResponse;
}
Please refer to the Appendices section of this documentation for a deep dive into the QuoteRequest and all of its available parameters.
Display the Quote to the User
The quote can be displayed to the user including a full price breakdown if desired. The following fields are available:
// This is the response from StringXYZ.Quote()
public class Quote
{
  public TransactionRequest request;
  public Estimate estimate;
  public string signature;
}

// This is the price breakdown estimate
public class Estimate
{
  public long timestamp;
  public string baseUSD;
  public string gasUSD;
  public string tokenUSD;
  public string serviceUSD;
  public string totalUSD;
}
Gather Payment Information
There are two ways users can provide a payment method:
- Create a new payment method
- Select a saved payment method
As you implement string in your game, you should present both options to the user in the payment UI.
Whichever approach the user chooses to take, the resulting payment information is stored in the same struct:
Below you will find instruction for each approach.
Create a new payment method
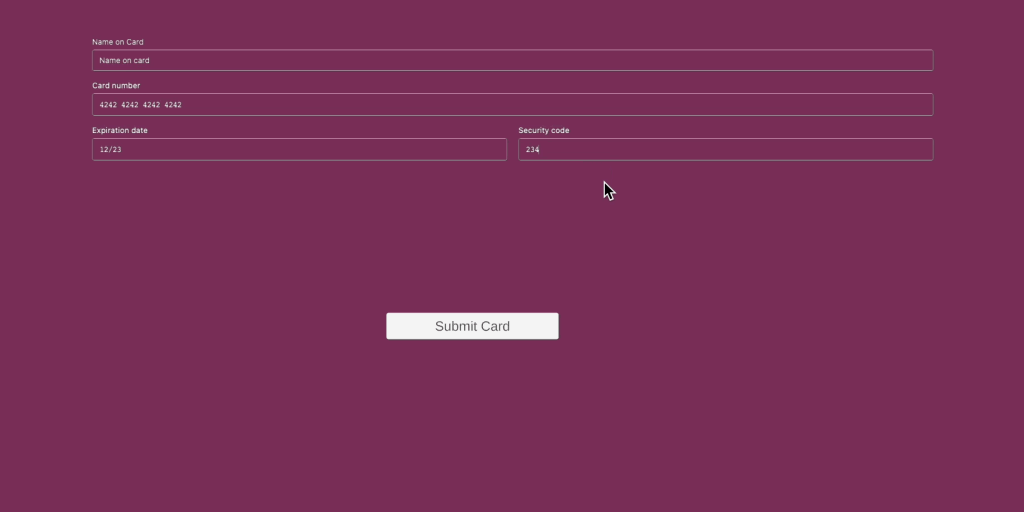
String has provided a secure webview to collect payment information from the user in a PCI compliant way. See Integrate Payment WebView for more details.
Within your interface, you should include a means for the user to submit the payment information they provided in the webview, such as a "Submit Card" button. The user's submission should call WebEventManager.SubmitCard() this will generate a card payment token which can be used to create a PaymentInfo object.
WebEventManager.SubmitCard();

var paymentInfo = new PaymentInfo(cardToken: StringXYZ.GetPaymentToken())
Use a Saved payment method
A user should be presented saved card payment methods in your UI in a way that they can select them. Once selected, the user will need to provide the CVV (aka CVC) in order to validate the card payment.
To retrieve a list of the user's saved cards, you can call await StringXYZ.GetCards().
Once you have the user's card selection and associated CVV, you can create a payment info struct as follows:
PaymentInfo paymentInfo = new PaymentInfo(
	cardId: "<users-selected-card-id>",
	cvv: "<users-selected-card-cvv>"
)
Execute the Transaction
Now that you have an up to date quote and the user's payment info, the user should be free to execute the transaction. Upon your application receiving confirmation of the user's intent (say through a "Buy Now" button), you can execute the transaction by creating an ExecutionRequest object and passing that to the Transact method.
ExecutionRequest executionRequest = new ExecutionRequest(
  quote: lastQuote,
  paymentInfo: paymentInfo
);

var txResponse = await StringXYZ.Transact(executionRequest);
[Optional]Display Transaction Receipt to User
The Transact function returns a useful object with the TX ID and a link to the Transaction on whichever block explorer is associated with the network. You are welcome to display this information to the user.
public class TransactionResponse
{
  public string txId;
  public string txUrl;
}
UI Customization of the Credit Card Info Prefab
You can customize some of the style elements of the Credit Card Info Prefab. Construct a Style and call SetStyle:
WebEventManager.SetStyle(new(
baseColor: "black",
baseSize: "16px",
autofillColor: "black",
hoverColor: "white",
focusColor: "gray",
validColor: "black",
invalidColor: "red",
placeholderBaseColor: "black",
placeholderBaseSize: "16px",
placeholderStateColor: "black"));
Integration Complete!
Updated 11 months ago