
Integration Steps
Once you have set up your environment, follow the steps below to integrate String Checkout into your game.
Step 1: Display The Button
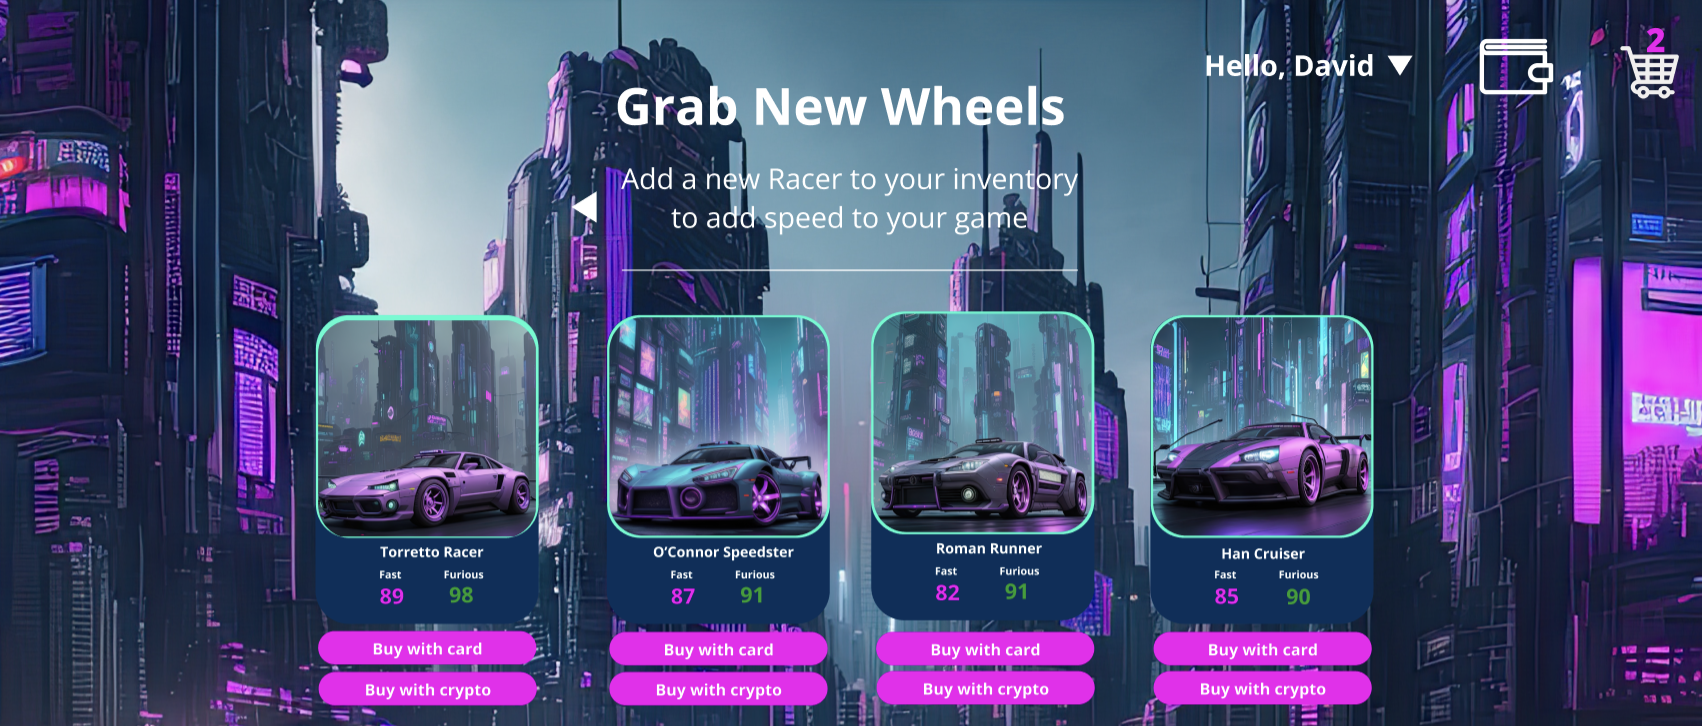
Within your game be sure to provide a way for the player to initiate a transaction. Most games use a "Pay with card" button placed somewhere near the in-game item. The image below is an example of what the button layout might look like in a game.
Here are some code examples of a button implementation:
<!--  React -->
<button onClick={() => window.StringPay.loadFrame(payload)}>Buy With Card!</button>

<!-- Svelte -->
<button on:click={() => window.StringPay.loadFrame(payload)}>Buy With Card!</button>
Step 2: Pass The Payload
If you notice, the code for the button in Step 1 contains an object called payload. This object contains all of the information needed to process the transaction, including asset information, contract interaction you want to perform, etc. Each time a player clicks the "buy" button you created in Step 1, you should pass a new payload to String in order to render and execute the correct transaction. The types are available by import from the SDK package.
The interface for the payload is as follows:
interface StringPayload {
	assetName: string;
	collection?: string;
	currency: string;
	price: number;
	imageSrc: string;
	imageAlt?: string;
	chainID: number;
	userAddress: string;
	contractAddress: string;
	contractFunction: string;
	contractReturn: string;
	contractParameters: string[];
	txValue: string;
	gasLimit?: string;
}
Examples and descriptions of the Payload fields can be found in the Web Payload Guide.
The following is an example of what this payload could look like:
{
	assetName: "String Demo NFT",
	collection: "String Demo",
	imageSrc: "https://gateway.pinata.cloud/ipfs/bafybeibtmy26mac47n5pp6srds76h74riqs76erw24p5yvdhmwu7pxlcx4/STR_Logo_1.png",
	imageAlt: "NFT",
	currency: "AVAX",
	price: 0.08,
	chainID: 43113,
	userAddress: userAddr,
	contractAddress: "0x41e11fF9F71f51800F67cb913eA6Bc59d3F126Aa",
	contractFunction: "mintTo(address)",
	contractReturn: "uint256",
	contractParameters: [userAddr],
	txValue: "0.08 eth",
}
Register your Smart Contract
Don't forget to onboard your Game's smart contract in the Dashboard to go live in Production.
Step 3: Display The String Transaction UI

After a player clicks on the "buy" button from Step 1, and you successfully send String the payload from Step 2, the String UI will be populated with the correct transaction information. Then, the player will be asked for some final payment details in order to complete the transaction. You will need to display the String UI so the player can enter in their payment details. To display this UI, have an empty div anywhere on your site with the class string-pay-frame.
Example:
<div class="string-pay-frame" />
The class string-pay-frame allows the SDK to know where you would like the iframe rendered.
...and that's it!
The SDK will handle everything else, calling the String API in order to acquire a quote for the player's transaction, performing the corresponding transaction on-chain, etc.
Updated 10 months ago
Need more clarification? Check out the resources below!